

Published October 31, 2023
DIY Garage Floor Epoxy!

Benefits
- Durability: Epoxy coatings create a strong and resilient surface that can withstand heavy traffic, impacts, and various chemicals. This durability makes it ideal for garages where vehicles, tools, and equipment are often moved around.
- Protection: Epoxy coatings protect the underlying concrete from moisture, stains, and abrasion. They help to prevent oil, grease, and other automotive fluids from seeping into the concrete and causing damage.
- Easy to Clean: Epoxy-coated surfaces are smooth and non-porous, making them easy to clean. Spills and stains can be wiped up without leaving lasting marks, which is especially important in a garage where spills are common.
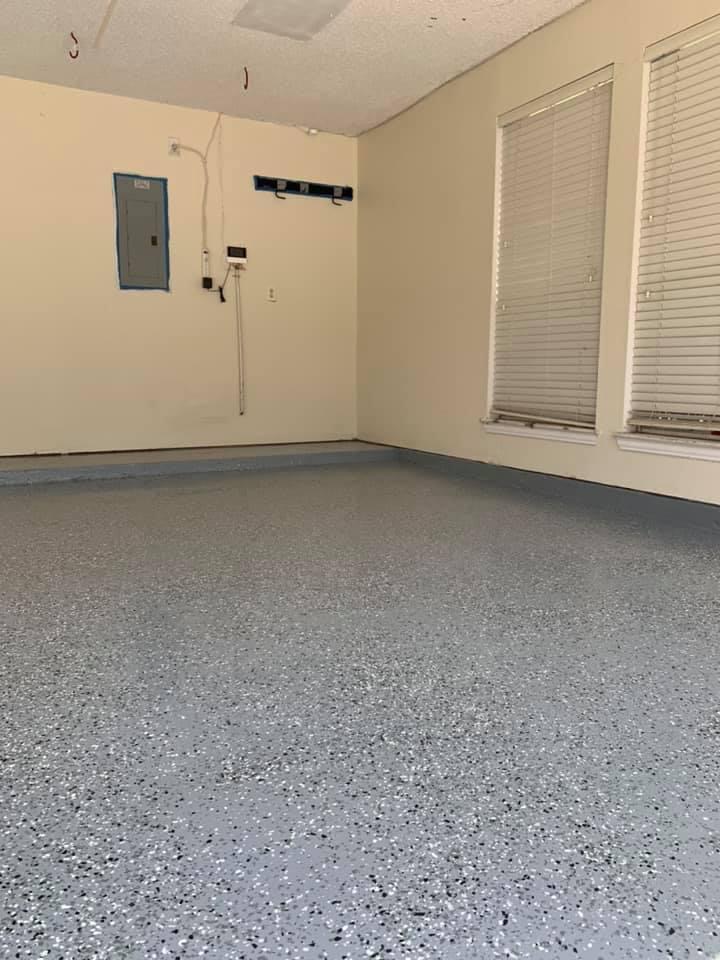
- Aesthetic Appeal: Epoxy coatings come in a wide range of colors and finishes, including high-gloss, metallic, and flake options. This allows you to customize the look of your garage floor to complement your overall design and personal style.

Estimated timeframe for completion:
- Preparation: 4-6 hours
- Application: 2-3 hours
- Total Time: 2-3 days
Things you need to know:
Expoxy can give your garage the facelift it needs, but it's also as fickle as Texas weather. Speaking of, you need to plan your weekend project accordingly. It should remain lower than 88* but higher than 66* for a full 24 hours. Once you mix the activator and resin you're on the clock so be sure you've prepped accordingly. If you currently have old epoxy on your floor we would recommend hiring a company (trust us you don't want to deal with the backbreaking work to remove it - looks like peeling or chipped pain on the floor).
Things you'll need:
- Power Washer
- Hose
- Leaf Blower (optional but useful)
- Broom
- Painters Tape
- Scrub Brush
- Latex Gloves
- Epoxy Kit (2 car garage, will need 2 of those for a 3+ car)
- Clear Coat
- Liquid TSP
- Pump Sprayer
- Muriatic Acid
- Respirator Mask
- Paint Brushes
- Paint Cup
- Hand Scraper
- Roller Heads
- Pole
- Small Clear Coat Mixing Bucket
- Color Chips/Sprinkles (optional)
- Sealant (only if you have divots or small cracks)
Step 1: Clear out your garage. Anything you can take out - do.
Step 2: Use a leaf blower to get rid of any debris.
Step 3: Sweep out the cracks and crevasses. Recommend a shop vac for the corners and in between the drywall and garage lip.
Step 4: Power wash the entire garage to get rid of any old paint, dirt, etc. that's on the floor. If there's anything sticking to the floor the powerwasher is having a hard time with, use your hand scraper to pull it up.
Step 5: Degrease the garage floor. If there are any oil stains add a splash of TSP let it sit for 1 hour and then scrub like crazy. Once you've gotten any oil spots up do a quick power wash once more to get rid of any residue. Make sure there are no pools of water sitting, if there is just get a broom, scrub brush, or squeegee and brush it out of your garage.
Step 6: Wait til your garage is about 70% dry and you can start etching the concrete. Etching the concrete floor is the process of marring the surface to improve adhesion. You’re going to need the spray pump, respirator mask, and closed-toed shoes. Follow the directions provided by the manufacturer and mix the etching solution with water in your spray pump. Put your respirator on and start in one corner of the garage and work your way backwards covering all concrete surfaces. Do NOT get this on your drywall. Once you’ve completed etching leave your garage door cracked to increase dry time.
Step 7: Once your garage is completely dry (not 70% - it needs to be 100% dry!) you’re ready for final checks and prep. If you have any cracks or divots in your floor, this is when you need to use your sealant (use gloves when applying and let cure for 30 minutes). If you don’t have a large gap between your drywall and garage lip you need to use painters tape to tape around the edges of the garage. This will also give you the opportunity to double-check check all dirt and cobwebs are cleaned out of any cracks.
Step 8: Final sweep
Step 9: YOU"RE READY TO EPOXY! Make sure you have all items you need laid out; paint brushes, paint cups, roller head/pole, & sprinkles on standby. If you’re using the kit linked in this article you’re going to gently pop the seal in the middle of the bag to mix the paint and the adhesive within the bag. If you’re confused, follow the instructions from the manufacturer. Put on your latex gloves & flip the bag multiple times to mix well and cut open a hole in the corner. Pour some epoxy into your paint cup and paint the edges/lip of the garage first with a brush.
Step 10: Once the edges/lip are painted it’s time to use your roller. You can pour the epoxy directly out of the bag onto the floor (PUT THE BAG FULL OF EPOXY INTO THE BOX IT CAME IN SO YOU DON’T KNOCK IT OVER). We like to paint in 5x5 sections to make sure everything is evenly spread. Once the section is done throw your sprinkles. If you bought the bag linked you have plenty for a 2-car garage to cover thoroughly so don’t be stingy. If you choose to use the sprinkles provided in the kit try to sparse them out so you have some left at the end. Once one section is done, repeat the process til’ the garage is fully painted. Side note: We don’t use the etching bag supplied within the epoxy kit, the clear coat you buy has anti-skid adhesive built in.
Step 11: Wait 24 hours
Step 12: Blow out any loose sprinkles
Step 13: Get out your small clear coat mixing bucket (linked above) and your clear coat, and follow the instructions provided by the manufacturer. The clear coat is much more difficult to see when applying so be sure to roll it out in smaller sections (3x3). Once you’ve successfully finished the clear coat you’re done!
**Wait 48 hours before parking any cars or putting anything back in the garage for it to fully cure**


